

Last Updated: July 12, 2026
Learning how to use a microneedling device at home offers professional-grade results without the dermatologist price tag. At Beautivana, we understand the appeal, at-home microneedling delivers genuine benefits when done correctly, but it requires precision, proper hygiene, and realistic expectations. Below, we'll walk you through everything you need to know to use a microneedling device safely and effectively, from needle selection to post-treatment recovery.
The key to success lies in understanding your skin's tolerance, following strict sanitation protocols, and respecting the recovery timeline. Most disappointing results stem from skipping critical prep steps or overestimating how frequently you can safely treat your skin.
You'll need a quality microneedling device as your foundation. The Beautivana Wireless Microneedling Pen Kit - Adjustable Professional Skin Renewal Device offers adjustable needle depths, wireless convenience, and professional-grade engineering at $155.00, eliminating guesswork and giving you precise control over treatment intensity.
Gather these essentials:
Quality matters. Using contaminated tools or cheap alcohol solutions defeats the purpose of microneedling.
Hyaluronic acid serum is the gold standard, it hydrates deeply and supports skin barrier recovery. Avoid applying retinol, acids, or strong actives immediately before microneedling, as your skin barrier will be temporarily compromised.
Needle depth is non-negotiable. Too shallow and you won't trigger collagen induction. Too deep and you risk scarring and infection.
Microneedling works by creating controlled micro-injuries that stimulate collagen and elastin production. Needle lengths are measured in millimeters:
Research confirms that 0.5mm to 0.75mm depths deliver the best risk-to-benefit ratio for at-home use. Most at-home devices appropriately max out at 0.75mm.
Sensitive or compromised skin (active acne, rosacea, eczema): Start at 0.25mm. Progress to 0.5mm only after several weeks of successful treatments.
Normal to combination skin with mild concerns: 0.5mm is your sweet spot. Use safely every 4 weeks.
Thick or resilient skin with deeper concerns: 0.75mm may be appropriate after building tolerance with 0.5mm treatments.
Darker skin tones: Proceed cautiously. Deeper needle depths increase post-inflammatory hyperpigmentation risk. Stay at 0.5mm or below and space treatments every 6-8 weeks.
Consistent, moderate-depth treatments outperform occasional aggressive treatments.
Cross-contamination can introduce bacteria into fresh micro-wounds, leading to infection and scarring. Sanitation is the foundation of safe at-home treatment.
Step 1: Soak in isopropyl alcohol. Place your device cartridge in 70% isopropyl alcohol for 10-15 minutes. This kills most bacteria and viruses.
Step 2: Remove and air dry. Place on a clean, lint-free surface and let dry completely (20-30 minutes). Do not use while wet.
Step 3: Store in a clean container. Once dry, place in a sealed, clean container.
On treatment day, sanitize your hands thoroughly and put on sterile surgical gloves before touching your device or face. Use a fresh cartridge for each treatment if your device has replaceable cartridges.
Immediately after treatment:
For disposable cartridges, discard after single use. For reusable devices, replace cartridges every 5-10 uses as needles dull with repeated puncturing.
Store clean, dry devices in a sealed container away from humidity and dust.
Wash your face with a gentle cleanser and pat dry completely. Wait 10-15 minutes before beginning to allow skin to fully dry.
Apply numbing cream if using one. Most take 15-20 minutes to become effective. Wipe away excess before starting.
Apply a generous layer of hyaluronic acid serum across your entire treatment area. The serum acts as a lubricant and delivers active ingredients into your skin.
Hold the device at a 90-degree angle to your skin. Use light pressure, let the vibrating needles do the work. Move the device in one direction only: vertical, horizontal, or diagonal strokes. Do not use circular motions.
Start with vertical strokes across your forehead, making 4-6 passes. Then switch to horizontal strokes across the same area, making 4-6 passes. Finally, do diagonal strokes, 4-6 passes total.
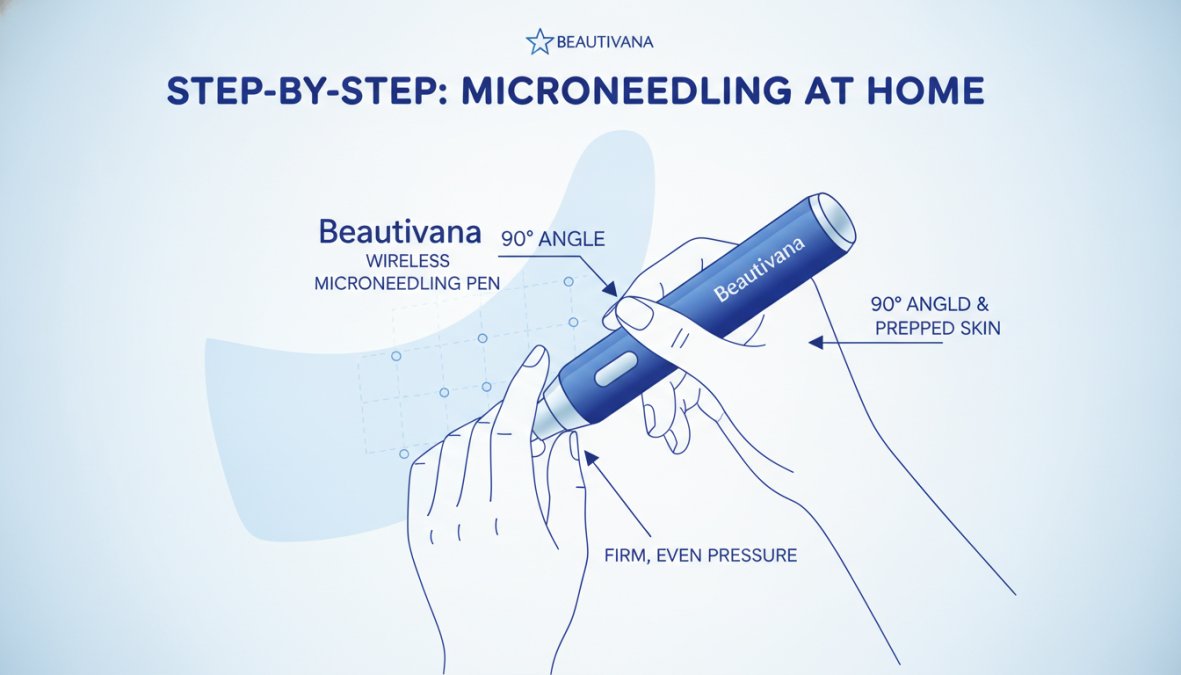
After the forehead, move to your cheeks using the same three-direction technique. Spend slightly more time on areas with visible concerns.
Treat the chin and jawline with extra light pressure, making 3-4 passes per direction. Around the eyes requires caution, use your gentlest pressure and shallowest needle depth (0.25-0.5mm maximum), making only 2-3 passes per direction.
Treat the neck and décolletage with slightly lighter pressure than your cheeks.
Total treatment time should be 10-15 minutes.
Stop when you've covered your entire treatment area. Gently pat your face with clean gauze to remove excess serum.
Apply a calming moisturizer or hydrating mask with centella asiatica, niacinamide, or panthenol. Avoid fragrance, essential oils, and strong actives.
Skip makeup, sunscreen, and other topicals for at least 4 hours.
What you do after microneedling determines whether you see glowing results or prolonged inflammation. Aftercare is as important as the treatment itself.
Hours 0-4: Keep hands off your face. Do not touch, pick at, or examine your skin.
Hours 4-12: Gently cleanse with lukewarm water and mild cleanser. Pat dry and apply calming moisturizer.
Hours 12-24: Continue gentle cleansing and moisturizing. Use lukewarm or cool water, not hot. Apply a cool compress if desired.
During this first 24 hours, avoid:
Your skin will look noticeably red and may feel tight. This inflammation response typically fades 50-70% within 24 hours and nearly completely within 48 hours.
By day 2, most visible inflammation has subsided. You can resume light makeup if needed. Your skin may feel slightly tight or dry as the barrier rebuilds.
Days 2-3 may bring slight flaking or peeling as dead skin sheds. Do not exfoliate or pick; let it shed naturally.
During days 2-7, you can reintroduce:
Continue avoiding strong actives, fragrance, strenuous exercise, and hot water.
By day 7, your skin barrier has largely recovered. Real collagen remodeling takes 4-8 weeks.
Frequency determines whether you damage your skin or build meaningful results.
For 0.25mm treatments: Every 2 weeks is safe. Skin recovery is fast and inflammation is minimal.
For 0.5mm treatments: Every 4 weeks is optimal. This allows full recovery and collagen remodeling while maintaining treatment momentum.
For 0.75mm treatments: Every 6-8 weeks minimum. Deeper penetration requires longer recovery.
Most people need 4-6 treatments to see significant improvement in fine lines, texture, and pore size. Deeper concerns like acne scarring may require 6-8 treatments over 6-12 months.
Once you've achieved desired results, switch to maintenance: one treatment every 8-12 weeks.
Persistent redness beyond 48 hours suggests your skin barrier isn't fully recovering. Space treatments further apart.
Excessive swelling or puffiness not resolving within 24 hours indicates over-treatment. Reduce frequency or needle depth.
Increased sensitivity to normal products means your barrier is compromised. Pause treatments for 2-4 weeks.
Persistent breakouts or increased acne suggests contamination or over-treatment. Review sanitation and reduce frequency.
Flaking or peeling lasting more than 5-7 days indicates your skin needs more recovery time.
If you're seeing these signs, your current frequency is too aggressive.
Using the device without sanitizing it first. This is how infections start. Sanitize every single time.
Sharing your device with others. Keep your device personal.
Treating over active acne, open wounds, or inflamed skin. Wait until breakouts heal completely.
Not washing hands or wearing gloves during treatment. Wear sterile gloves throughout.
Storing the device in a humid environment. Store in a cool, dry place in a sealed container.
Treating too frequently. Impatience leads to chronic inflammation and slower improvement. Respect minimum spacing.
Using too much pressure. The device does the work. Use light pressure.
Making too many passes over the same area. Four passes per direction is sufficient.
Using needle depth that's too aggressive for your skin type. Start shallow and progress gradually.
Microneedling every single week. Minimum spacing is 2 weeks; 4 weeks is better.
Applying strong actives immediately before or after microneedling. Wait at least 48 hours before reintroducing retinol, vitamin C, or acids.
Using serums with fragrance or essential oils during treatment. Use fragrance-free products exclusively.
Applying serums that don't penetrate well. Lightweight serums with hyaluronic acid work best.
Not patch-testing new serums before full-face treatment. Test on a small area first.
Microneedling is generally safe when done correctly, but it's not appropriate for everyone.
Active acne or severe breakouts. Wait until breakouts resolve completely.
Open wounds, cuts, or abrasions. Let wounds heal fully first.
Rosacea or severe redness. Microneedling triggers inflammation, which exacerbates rosacea.
Eczema or other inflammatory skin conditions. Your skin barrier is already compromised.
Keloid or hypertrophic scar history. Consult a dermatologist before treating.
Immunocompromised conditions or medications. Infection risk is higher.
Pregnancy. Wait until after pregnancy and breastfeeding.
Recent chemical peels, laser treatments, or professional microneedling. Your skin needs 4-6 weeks to recover.
Accutane or recent isotretinoin use. Wait at least 6-12 months after finishing.
Excessive redness or inflammation lasting more than 48 hours. Stop treating immediately and focus on barrier repair. If redness persists beyond 5 days, see a dermatologist.
Swelling that doesn't improve within 24 hours. Apply cool compresses and avoid heat. Seek medical attention if swelling worsens.
Signs of infection: increasing redness, warmth, pus, or fever. Stop treatment immediately and see a dermatologist.
Persistent itching or burning. Stop using the offending product and switch to a simpler moisturizer.
Hyperpigmentation or dark spots appearing after treatment. Use SPF 30+ religiously for 2 weeks and space treatments further apart.
Scarring or indented marks. Stop at-home microneedling immediately and see a dermatologist.
Persistent sensitivity to normal products after treatment. Pause all treatments for 4-8 weeks and focus on barrier repair.
If you experience anything beyond mild redness, swelling, or temporary sensitivity, stop and consult a dermatologist. Your long-term skin health is more important than any single treatment.
At-home microneedling delivers real results when you respect the process: proper sanitation, appropriate needle depth, realistic frequency, and thorough aftercare. The Beautivana Wireless Microneedling Pen Kit provides the precision and adjustability you need to treat safely across different skin types and concerns. Start with 0.5mm depth, space treatments 4 weeks apart, and give yourself 3-4 months to assess meaningful improvement. Your skin will thank you with smoother texture, refined pores, and radiance that comes from genuine collagen remodeling.
Yes, at-home microneedling is safe when you follow proper sanitization, use appropriate needle lengths (0.25mm for beginners), and adhere to recommended frequency. Always disinfect your device with isopropyl alcohol before and after use, wear sterile surgical gloves, and avoid treatment if you have active infections or compromised skin barriers. Start conservatively with lower needle depths and increase gradually as your skin adapts.
For home use, 0.25mm is ideal for beginners and sensitive skin, promoting collagen induction therapy without significant discomfort. Intermediate users may progress to 0.5mm for addressing fine lines and texture. Avoid needles longer than 0.75mm at home, as deeper penetration into the dermis carries higher risks of scarring and should be left to professionals. Always match needle length to your skin concern and sensitivity level.
For 0.25mm devices, treatment every 7-10 days is safe for most skin types. At 0.5mm, space treatments 2-3 weeks apart to allow the skin barrier to fully recover. Never microneedle more than once weekly, as this increases inflammation, erythema, and risk of adverse reactions. Allow at least 48 hours between sessions; your skin needs time to rebuild collagen and repair the controlled micro-injuries.
Immediately post-treatment, apply hyaluronic acid serum to hydrate and soothe the epidermis. Follow with a gentle moisturizer and broad-spectrum SPF 30+ sunscreen. In the following days, use nourishing serums with calming ingredients like centella asiatica. Avoid active ingredients (vitamin C, retinol, acids) for at least 48 hours. Consistent aftercare minimizes inflammation and maximizes collagen remodeling for visible improvements in skin texture and fine lines.
This article was written using GrandRanker