

Last Updated: July 29, 2026
Microneedling at home safety guide is essential for anyone looking to rejuvenate their skin effectively. Microneedling triggers the body's natural healing response, stimulating collagen and elastin production without invasive surgery. This process, known as collagen induction therapy, has become one of the most accessible professional-grade treatments available for at-home use. When needles penetrate the skin's surface, they create micro-injuries in the dermis layer without damaging the epidermis. Your body responds by flooding the area with healing compounds: collagen, elastin, and growth factors. The difference between safe microneedling at home and dangerous DIY skincare comes down to needle depth, frequency, and technique.
Microneedling works through the wound-healing cascade. First comes inflammation, which signals your immune system to send healing resources to the area. Then comes proliferation, where fibroblasts actively produce new collagen. Finally comes remodeling, where the skin strengthens and tightens over 8-12 weeks. Meaningful improvements in acne scarring, fine lines, and skin texture require 4-6 treatments spaced 4-6 weeks apart. This timeline prevents over-treating, which damages your skin barrier.
For acne scarring, collagen induction literally fills depressed scars from the inside out. Atrophic scars (pitted) respond best because new collagen rebuilds lost tissue. Fine lines smooth out as collagen density increases, making skin plumper and naturally reducing surface lines. Skin texture improves across the board: enlarged pores shrink, rough patches smooth, and overall radiance increases.
Selecting the wrong device is where most at-home microneedling fails. Your choice between device types determines everything about safety and results.
Derma rollers use multiple needles on a cylinder that you roll across your skin. Microneedling pens use a single or double row of needles that move vertically, creating perpendicular punctures. Derma rollers are cheaper and portable, but the rolling motion creates drag, causing unnecessary trauma. Needle depth is harder to control, and they're difficult to sanitize properly.
Microneedling pens offer superior control. The vertical stamping motion creates cleaner punctures without drag. Needle depth is consistent across the entire treatment area. Disposable cartridges eliminate sanitization concerns. For serious results at home, a pen is the better choice.
The Beautivana Wireless Microneedling Pen Kit offers adjustable needle depth and cordless convenience, making it ideal for consistent home treatments without the learning curve of manual rollers.
A dermatologist-approved device means the manufacturer tested it for safety and efficacy. Look for FDA clearance or CE marking in Europe. Adjustable needle depth is non-negotiable, you need to start shallow (0.5mm) and progress gradually. Sterile, replaceable cartridges matter more than reusable needles, which accumulate microscopic damage over time.
Build quality affects results. Cheap pens vibrate inconsistently, creating uneven needle penetration. Professional-grade devices maintain consistent speed and depth across the entire treatment.
Most microneedling injuries happen because people skip preparation. Your skin needs to be clean, your workspace sterile, and your device disinfected. These steps take 15 minutes but prevent 90% of complications.
Start with a gentle cleanser like CeraVe or Vanicream, nothing with active acids or exfoliants. Wash for 30 seconds, rinse with lukewarm water, and pat dry completely. Wet skin increases infection risk during microneedling. Wait 10 minutes after cleansing for your skin barrier to stabilize.
Check your skin barrier integrity before proceeding. If you have active eczema, severe dermatitis, or open wounds, stop. Microneedling on a compromised barrier causes excessive inflammation and infection risk. Wait until your skin is stable.
Use 70% isopropyl alcohol, not higher concentrations, which evaporate too quickly to kill bacteria effectively. Soak the needle cartridge or roller for 10 minutes before use. For pens with replaceable cartridges, replace with a sterile one each session. For rollers, soak the entire barrel and let it air-dry completely on a clean paper towel.
Store your device in a clean, dry container. Moisture and dust invite bacterial growth. If using a roller, store it with the needles facing up so gravity doesn't press them into contaminated surfaces.
Needle depth is the single most important safety variable in microneedling at home. Too shallow and you get no results. Too deep and you risk scarring, infection, and permanent damage.
0.5mm needles penetrate the upper epidermis only and don't reach the dermis where collagen lives. Use 0.5mm for your first session to assess tolerance. 1.0mm needles reach the dermal layer where collagen production happens, this is the sweet spot for most at-home treatments. After 2-3 sessions at 0.5mm, progress to 1.0mm. 1.5mm needles go deeper into the dermis and should only be used after 4-6 sessions at 1.0mm. 2.0mm and deeper are professional-grade depths, don't use these at home.
Progress depth only after completing at least two sessions at your current depth and experiencing minimal inflammation. If session two at 1.0mm leaves you red and swollen for 48 hours, repeat 1.0mm before going deeper. Watch for signs you've gone too deep: severe swelling lasting more than 48 hours, blistering, oozing, or signs of infection. If any occur, stop immediately and see a dermatologist.
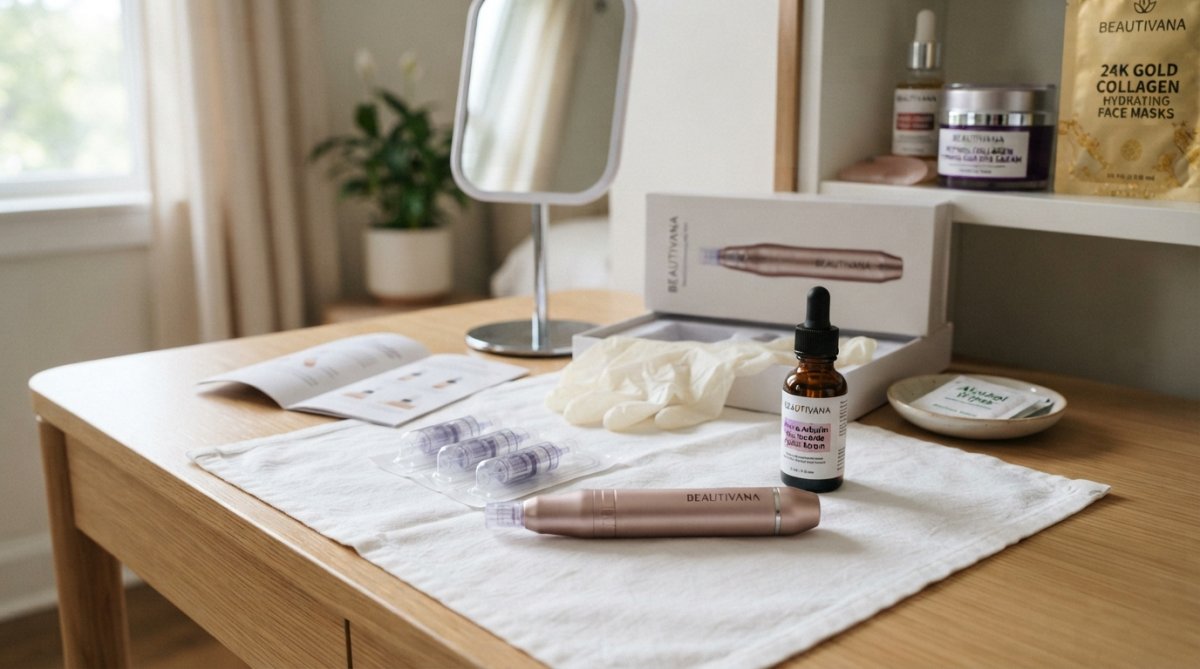
The actual microneedling process takes 10-15 minutes. Proper technique prevents patchy results and unnecessary inflammation.
Apply a lidocaine numbing cream with 4-5% lidocaine 15-20 minutes before microneedling. This allows the numbing agent to penetrate and deaden nerve endings. Don't skip numbing, microneedling without anesthetic is uncomfortable and causes involuntary flinching that disrupts technique. After 15-20 minutes, gently wipe away excess cream with a clean tissue, leaving a thin layer on the skin.
Cross-hatching ensures even coverage and consistent collagen stimulation. Divide your face into sections: forehead, right cheek, left cheek, chin, nose. For each section, make four passes: vertical, horizontal, and two diagonal passes. This creates a grid pattern that guarantees even needle penetration.
Apply light pressure, let the needle do the work. Move slowly, taking 2-3 minutes per facial section. This pace allows proper needle penetration without excessive trauma.
The eye area is too sensitive for at-home microneedling. Stop at the orbital bone. The lips are also off-limits, lip skin is delicate and bleeds easily. Avoid the corner of the mouth where skin is thin and mobile. You can microneedle around active breakouts, but not directly on them. Microneedling an active pimple spreads bacteria and causes scarring.
Erythema (redness) is normal and expected. Your skin should look flushed immediately after treatment, typically fading within 2-4 hours but possibly lasting 24 hours on sensitive skin. Mild swelling is also normal and indicates successful collagen induction. Ice packs reduce swelling if needed.
Bleeding is less common but not concerning if it happens. Wipe gently with a clean tissue and continue. Heavy bleeding means you've gone too deep, stop treatment.
Frequency determines whether you see results or damage your skin. The right frequency depends on needle depth and your skin's response.
At 0.5mm, you can microneedle every 7-10 days. This shallow depth causes minimal inflammation and heals quickly. At 1.0mm, wait 4-6 weeks between treatments. Your skin needs time to produce new collagen and complete the healing cascade. At 1.5mm and deeper, wait 6-8 weeks minimum.
Most people follow this pattern: 4 sessions at 0.5mm (weekly), then 6 sessions at 1.0mm (every 4-6 weeks), then maintenance at 1.0mm every 8-12 weeks. This progression takes 6-7 months but delivers visible, lasting results.
Excessive inflammation lasting more than 48 hours indicates over-treatment. Persistent dryness and sensitivity suggest your skin barrier is compromised. Increased breakouts after each session suggest you're treating too frequently. If this happens, extend the interval between treatments.
What you do after microneedling matters as much as the treatment itself. The 48 hours following treatment are critical for healing.
Keep hands off your face for at least 4 hours after treatment. Your skin is open and vulnerable. Avoid water and sweating for 24 hours if possible. Skip all actives: no retinoids, vitamin C, acids, or strong serums. Your skin barrier is compromised and can't tolerate these ingredients. Avoid sun exposure completely for 48 hours. Your skin is photosensitive after microneedling. If you must go outside, wear a wide-brimmed hat and stay in shade.
Hyaluronic acid is safe and beneficial after microneedling. Apply it to damp skin immediately after treatment to maximize hydration. Growth factor serums and peptide serums support collagen production and skin repair, apply these 24 hours after treatment. Niacinamide is safe and calming, reducing inflammation and supporting barrier function.
Avoid vitamin C serums for at least 48 hours. Even stabilized vitamin C is acidic and can irritate freshly microneedled skin. Same rule applies to retinoids, AHAs, BHAs, and any other active ingredient.
SPF 30 minimum, every single day, starting 48 hours after treatment. Use a mineral sunscreen if chemical sunscreen irritates your freshly treated skin. For the first 2 weeks, reapply sunscreen every 2 hours if you're outside. Long-term healing continues for 8-12 weeks. You won't see full results for 3 months. During this window, maintain consistent sun protection and let your skin heal undisturbed.
Most at-home microneedling goes smoothly, but complications can happen if you rush progression or skip safety steps.
Inflammation lasting more than 48 hours indicates a problem. Normal post-microneedling redness fades within 24 hours. Stop microneedling immediately and apply cool compresses for 15 minutes at a time, several times daily. Use a gentle, fragrance-free moisturizer to support barrier repair. If inflammation persists beyond 72 hours, see a dermatologist.
Infection signs include warmth, pus, increasing pain, or lymph node swelling. See a dermatologist immediately, you'll likely need antibiotics. Prevent infection by maintaining strict sanitization protocols and never microneedling over active acne or open wounds.
Hyperpigmentation after microneedling is usually temporary, appearing 2-4 weeks post-treatment and fading over 3-6 months with consistent sun protection. Darker skin tones are more prone to this. Prevent it with religious SPF use starting immediately after treatment.
Scarring from at-home microneedling is rare but possible when you've used excessive depth, microneedled too frequently, or treated over active acne or wounds. Know when to stop. If you experience persistent adverse reactions despite following guidelines, your skin may not tolerate at-home microneedling. See a dermatologist to explore alternatives.
At-home microneedling works when you respect the process. The Beautivana Wireless Microneedling Pen Kit provides adjustable depth control and consistent needle delivery, eliminating guesswork from your routine. With proper sanitization, gradual progression, and diligent aftercare, you'll see measurable improvement in acne scarring, fine lines, and overall skin texture within 3-6 months. Start shallow, progress slowly, and protect your skin during recovery. That's how to use microneedling at home safely.
At-home microneedling can be safe when you follow proper protocols: use sterile devices, sanitize with 70% isopropyl alcohol, start with shallow needle depths (0.5mm), and wait adequate time between sessions. Main risks include infection, excessive inflammation, hyperpigmentation, and scarring if you microneedle too frequently or use incorrect needle depth. Always avoid active acne, open wounds, or certain medications. When in doubt, consult a dermatologist before starting.
Most experts recommend starting at 0.5mm for at-home use, which reaches the epidermis safely. After 4-6 weeks, you can gradually progress to 0.75mm or 1.0mm if your skin tolerates it well. Depths beyond 1.5mm should only be performed by professionals, as they penetrate deeper into the dermis and carry higher risks of complications. Never exceed 1.5mm at home, and always allow your skin barrier to recover between treatments.
At 0.5mm needle depth, microneedle every 2-4 weeks. At 0.75-1.0mm, space treatments 4-6 weeks apart to allow proper skin healing and collagen induction. Never microneedle more frequently than every 2 weeks, as this prevents adequate skin recovery and increases inflammation and adverse reaction risk. Signs you're overdoing it include persistent redness, sensitivity, or visible irritation beyond 24 hours post-treatment.
Immediately post-procedure, apply a gentle cleanser and hyaluronic acid serum to support skin barrier recovery. For the first 24 hours, avoid active ingredients like vitamin C, retinol, or acids. After 24 hours, you can resume serums and moisturizers. Always use SPF 30+ daily for at least one week post-treatment to prevent hyperpigmentation. Avoid heavy makeup, sweating, and direct sun exposure for 48 hours. Korean skincare products like hydrating masks pair well with microneedling recovery routines.
This article was written using GrandRanker